First you’re going to need to choose a phonological process to address in your therapy. This should have come from your assessment. Look at which processes the child is using that are no longer age-appropriate and are impacting intelligiblity the most.
Once you’ve chosen a process, you need to help the child hear the difference between what she says and what is correct. For that, we will find minimal pairs. Minimal pairs are sets of two words that differ only by one sound. For this, the one sound that is different will be the exact sounds that the child is doing in error. For example, if the child is using velar fronting (changing all /k/ and /g/ sounds to /t/ and /d/), then some good minimal pairs would be “key” and “tea”, or “go” and “dough”. Remember, it’s all about how they sound, not how they’re spelled.
Assemble your list of minimal pairs now. Here are some visuals to get you started. Click the link below to be taken to the phonological process that you’re working on:
Ok, now that you’ve picked some pairs, let’s get started with helping your client hear the difference between the two sounds!
One of my favorite ways to do this is with a fun little game called “Hide the Penny”. Here’s how to play:
- Place two cards in front of the child (a minimal pair). Tell the child what each one is called.
- Tell the child to close her eyes. Place a penny under one of the cards.
- Tell the child to open her eyes. Tell the child that you’re going to say the word that has the penny and they have to find it. Then, say the word by itself (not in a sentence) and see if the child picks up the right card.
- If the child doesn’t pick up the right card, point out the difference between the two sounds. Draw the child’s attention to your mouth and to the sound difference.
- Keep doing this until the child can hear the difference and pick the correct card each time.
For a video demonstration of the hide-the-penny game, click here!
You can play the hide-the-penny game for this step as well! Now, you’ll tell the child that you’re going to play the game again but this time, she’s not allowed to touch the cards, she has to tell you which card to pick up. Here’s how it goes:
- Place two cards in front of the child (a minimal pair). Tell the child what each one is called.
- Tell the child to close her eyes. Place a penny under the card with the sound that the child has trouble producing.
- Tell the child to open her eyes. Ask the child to guess which word is hiding the penny. Tell her she can’t touch them, she has to tell you.
- If she says the wrong word, repeat that (incorrect) word back to her and look under the incorrect picture. Have her try again. When she is confused, point out the difference between what she is saying and the word she is trying to say. Help use elicitation techniques to get her articulators in the right place to say the word correctly.
- Keep doing this until the child can say the sound class correctly in single words
For a video demonstration of the hide-the-penny game, click here!
Now that the child is able to say these words individually, it’s time to work on some short phrases. I like to start very simple by placing the two cards from a minimal pair in front of the child and having her say “I see ___. I see ___.”
Start simple like that and then work your way up to mixing the cards together and having her use a variety of different short phrases.
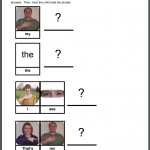
Here’s a phrase builder if you need it:
Is your client ready for sentences? Time to use those words to build sentences. I like to have my students try to come up with the sentences themselves. Bonus points if they can get two words with their target sound class into one sentence!
Use the cards/visuals you’ve been using for previous steps to continue with sentences.
Ok! Your client is able to use the target sounds in sentences, great!! Unfortunately, that doesn’t necessarily mean that he will automatically be ready for saying it correctly all of the time in conversation! Let’s try some of these simple structured conversation prompts to practice the sound in a more complex environment:
Sounds in Structured Conversation Pack

Reading Activities:
This is also a great time to have your client practice the new skill during reading activities. Here are a few resources to help you with that:


Now comes the hard part, getting them to do it the rest of the time!
Click Here to Watch the Carry-Over Webinar Recording
Tips for Encouraging Speech Sounds in Conversation
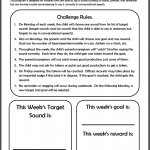
Speech Sound Carry-Over Challenge
This video explains when it is appropriate to start working on a phonological process that isn’t one we typically see in children. It also includes information about working on cluster simplification.


Check out this quick video to walk you through how to treat de-voicing:
Here’s a quick video on initial consonant deletion:
Oh velar fronting, you devil, you! Here are some ideas if your velar fronter isn’t responding to therapy:

In this example, the child is replacing all medial sounds with /h/:
This video explains when it is appropriate to start working on a phonological process that isn’t one we typically see in children. It also includes information about working on cluster simplification.
Sometimes we really struggle to get children to that very fist level. Here are some tips to help!
Watch this quick video on the types of phonological processes that are common in children with cochlear implants:

If you have a child with both phonological and articulation errors, that’s ok! Here’s some advice on how to work on both:

Pacing Boards can be a great tool for breaking up multi-syllabic words or helping to ensure a child is including all parts to a word. Check out this video explanation below: